
How to Integrate the SonicAura MCP Connector in OpenAI Codex
The integration of Model Context Protocol (MCP) into OpenAI's Codex has transformed it from a powerful coding assistant into a fully capable autonomous agent. By connecting external MCP servers, Codex can now interact with the real world—fetching web data, controlling browsers, and even processing audio.
In this guide, we will walk through how to integrate the SonicAura Studio MCP Connector into your OpenAI Codex environment. Once set up, you can simply prompt Codex to perform complex audio tasks, such as vocal separation, directly from your terminal or desktop app.
Prerequisites
Before we begin, ensure you have the following ready:
- Node.js (v16 or higher) installed on your machine.
- OpenAI Codex CLI installed (
npm install -g @openai/codex). (Note: If you encounterEACCESpermission errors, it is highly recommended to configure npm to use a user-level global directory rather than usingsudo.) - A SonicAura Studio API Key (starts with
sk_live_...).
Step 1: Configure the MCP Server
SonicAura Studio uses a remote Streamable HTTP server, meaning you do not need to download or run any local scripts. You can configure it directly through the Codex UI or by manually editing your config file.
Option A: Using the Codex UI
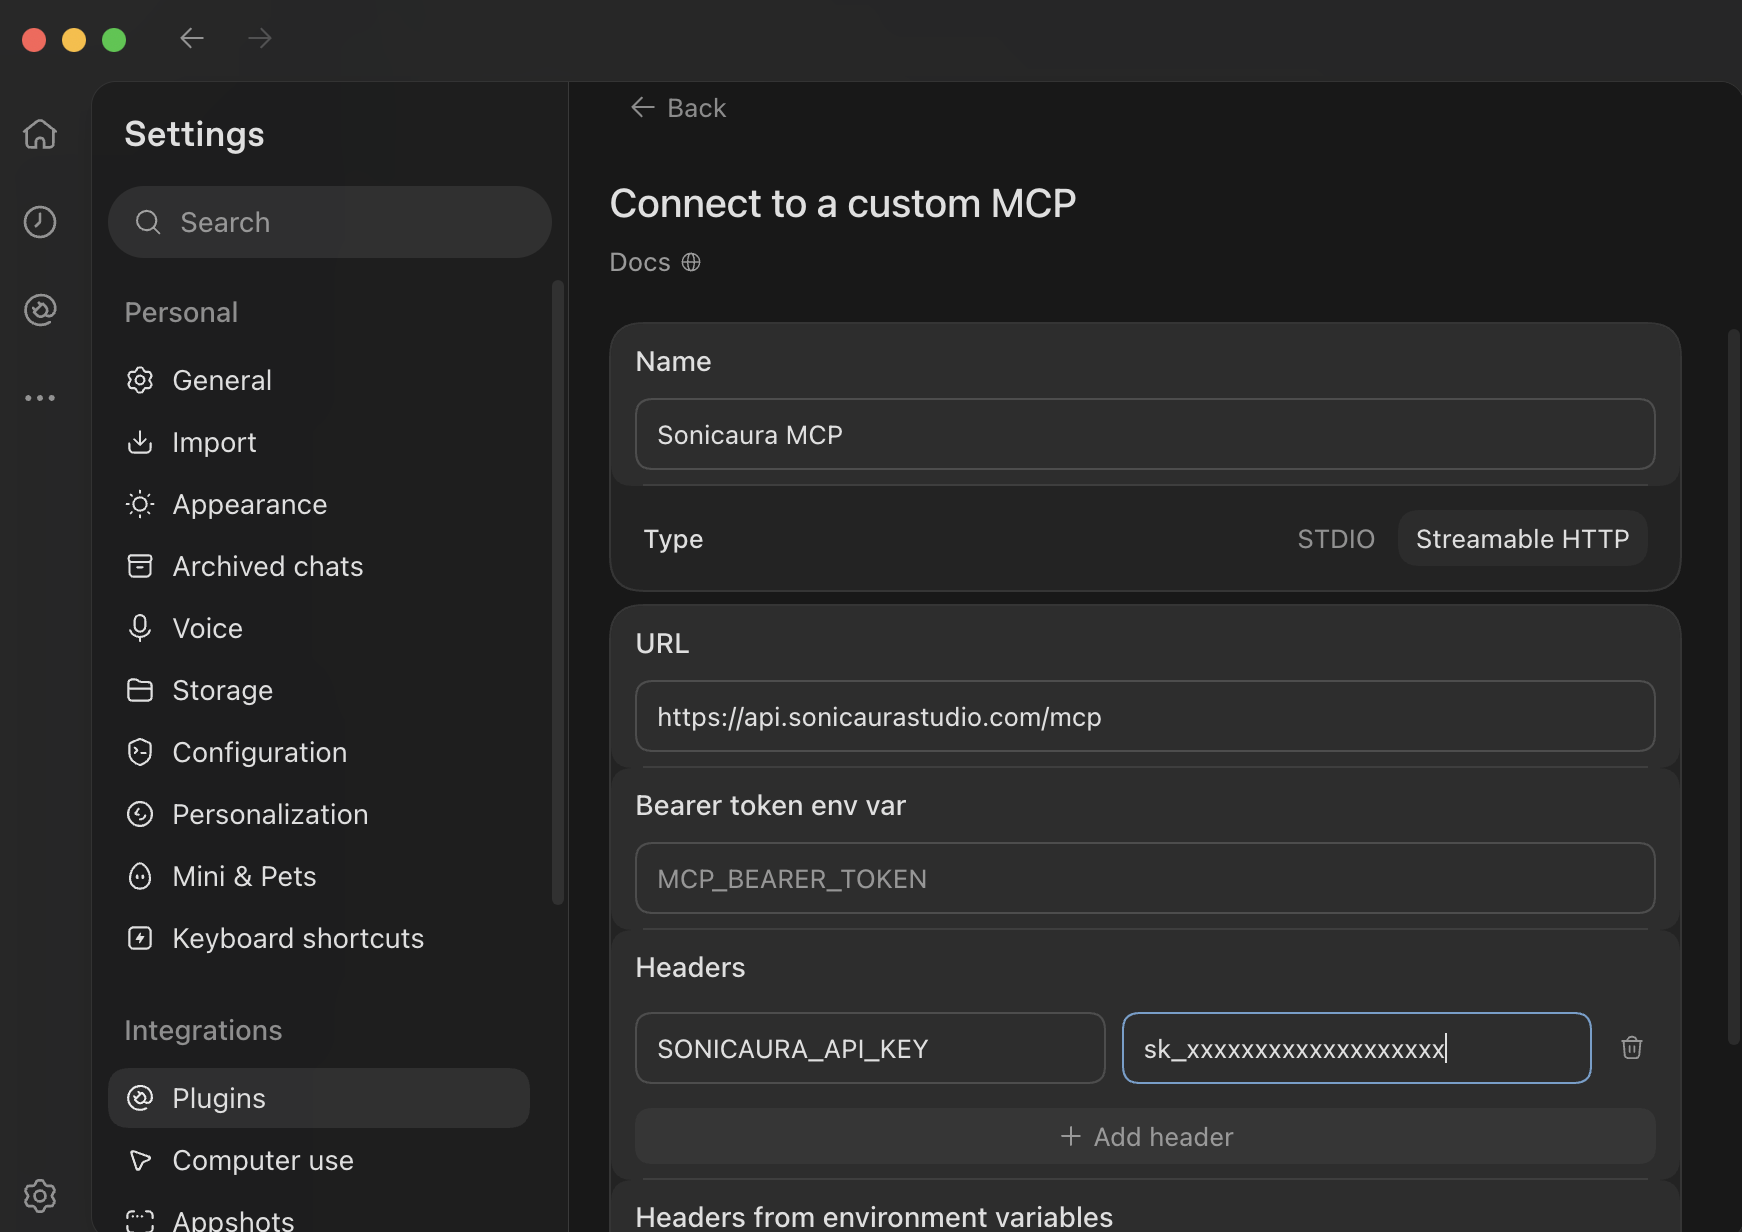
Open your Codex desktop app settings and navigate to Plugins -> MCPs -> Connect to a custom MCP.
Configure the fields as follows:
- Name:
sonicaura_mcp - Type: Select Streamable HTTP (Do not use STDIO).
- URL:
https://api.sonicaurastudio.com/mcp
As seen in the screenshot below:
Option B: Manual Configuration (Recommended for CLI)
For a more robust and secure setup, use environment variables to store your API key.
First, add your API key to your shell profile (e.g., ~/.zshrc or ~/.bashrc):
export SONICAURA_API_KEY="sk_live_your_api_key_here"
Run source ~/.zshrc to apply the changes.
Next, open your Codex configuration file located at ~/.codex/config.toml and append the following:
[mcp_servers.sonicaura_mcp]
url = "https://api.sonicaurastudio.com/mcp"
bearer_token_env_var = "SONICAURA_API_KEY"
Step 2: Verify the Integration
Once configured, it's time to verify that Codex can successfully communicate with SonicAura.
Open your terminal and run:
codex mcp list
You should see sonicaura_mcp listed as enabled with the Auth type set to Bearer token.
To see the actual tools available in your current session, launch the Codex interactive terminal by typing codex, and then type the following command inside the chat interface:
/mcp
This will output a list of all connected MCP servers and the specific tools they provide. If sonicaura_mcp appears with its audio processing tools, you are ready to go!
Step 3: Put It to the Test
Now that the agent has access to SonicAura's capabilities, you can give it a natural language prompt to process audio.
For example, you can ask Codex:
"Use the SonicAura tools to separate the vocals and instrumentals from this audio file: [path/to/audio.mp3]"
Codex will automatically formulate the correct tool call, send the request to the SonicAura API, and save the separated tracks back to your local directory.
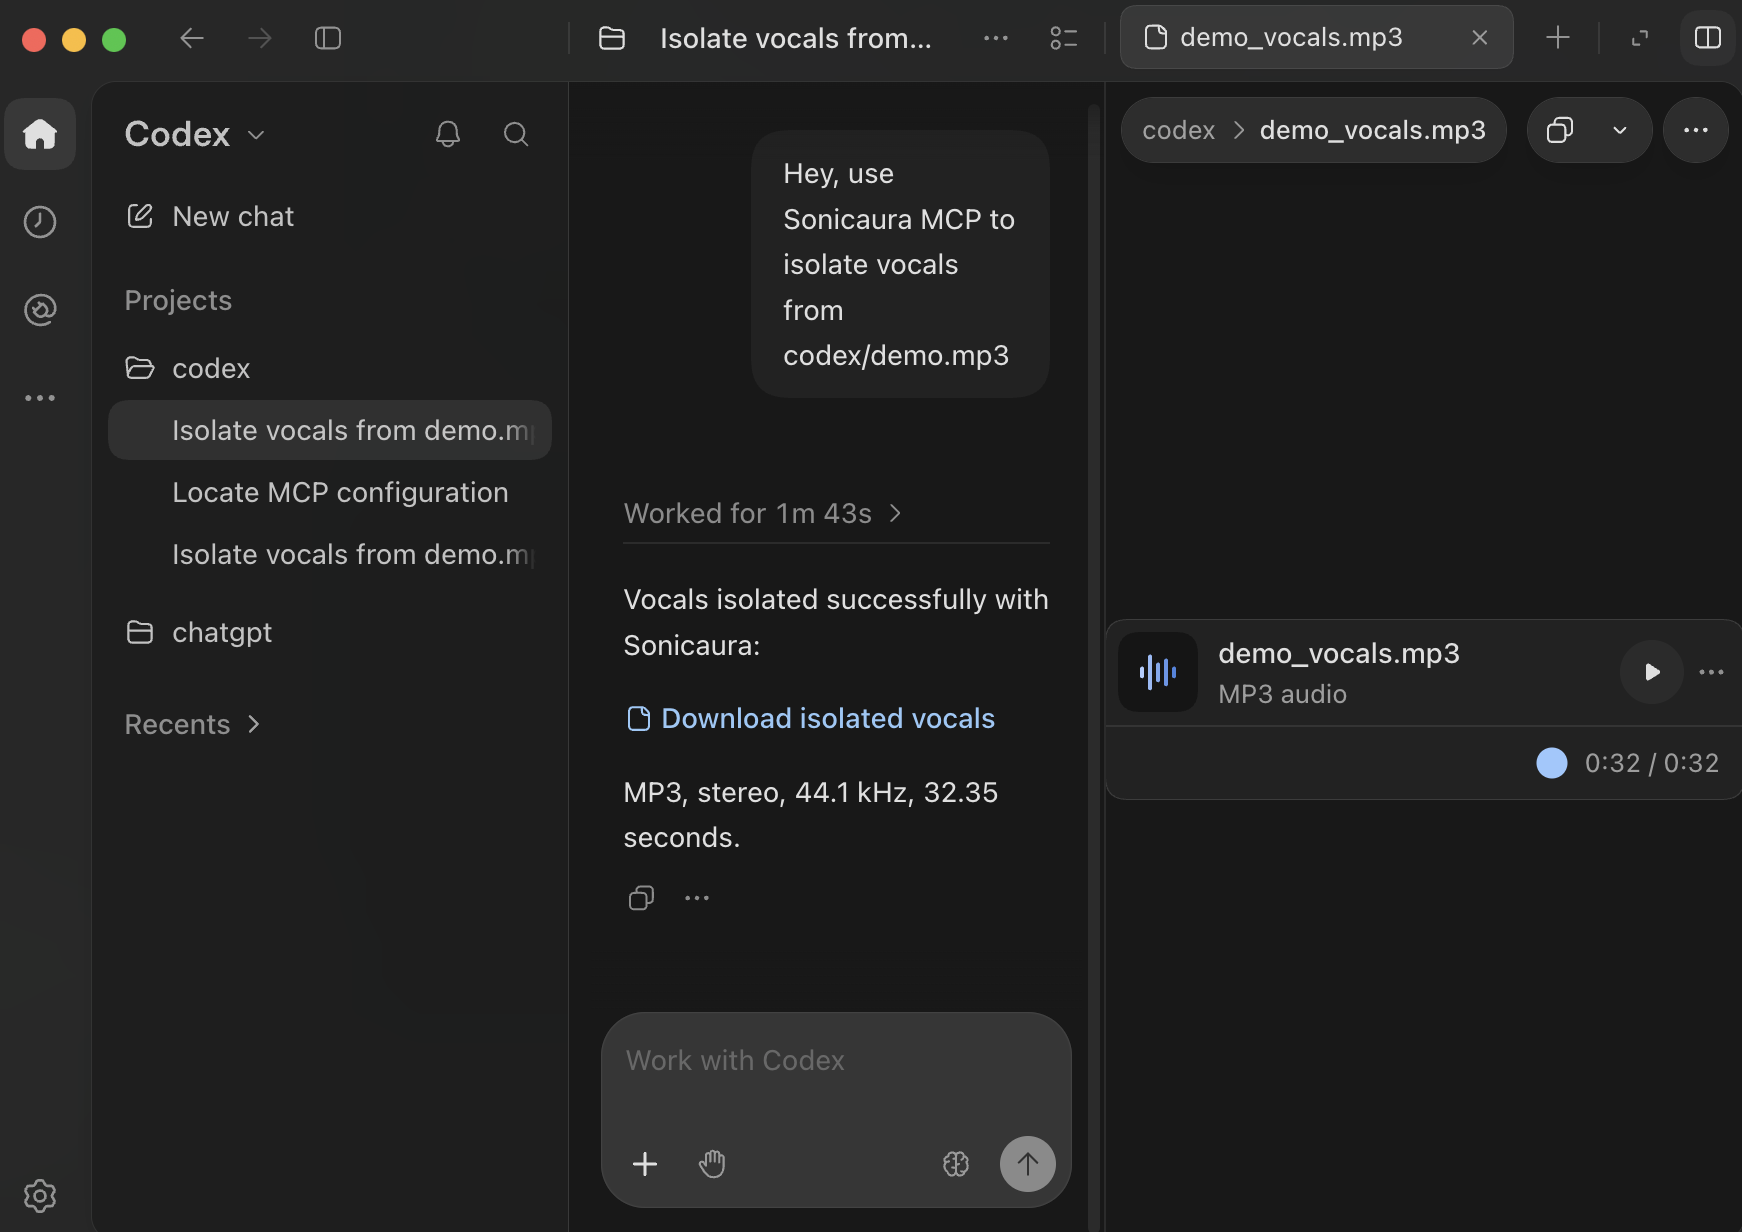
Here is an example of a successful vocal separation task executed entirely by Codex:
Conclusion
Integrating SonicAura into OpenAI Codex bridges the gap between code generation and media manipulation. By leveraging the Model Context Protocol, you can now build automated pipelines that transcribe, separate, and process audio without ever leaving your development environment.
Ready to give your agents the gift of hearing? Grab your SonicAura API key today and start building!